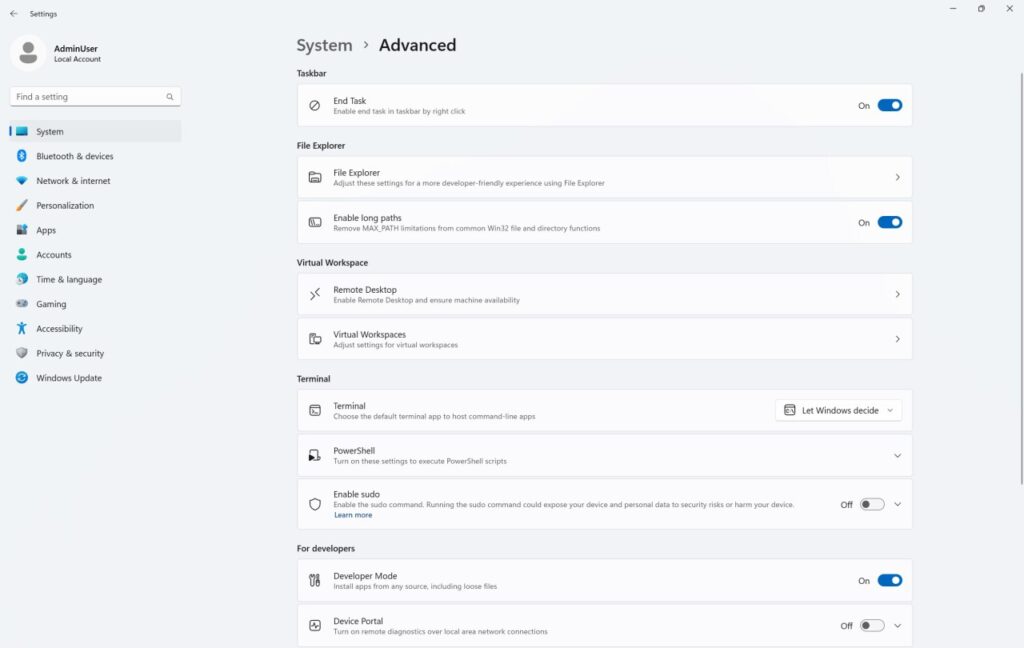
Recently, it was found that Microsoft is developing a new Windows 11 Settings area dubbed “Advanced Settings.” The page was first discovered in a Windows Server preview build, but it is now trickling out to Windows Insiders disabled by default (though it is readily fixable).
The “For Developers” section in Settings > System has been redesigned into the new “Advanced Settings” page. App developers and enthusiasts can adjust a variety of settings and parameters there. I did, however, clarify in my previous article “Do these five crucial things after installing Windows 11” that some of these are equally helpful for everyday users. More features have been added to the page, some of which were carried over from the now-defunct Dev Home app. Additionally, it now features an improved structure that facilitates exploration and navigation.

Although Microsoft has not yet made “Advanced Settings” public, the most recent Windows 11 preview builds from the Dev and Beta Channels already allow you to enable it. It’s interesting that Microsoft is releasing it through a Microsoft Store update; find the “Windows Advanced Settings” component under the “Downloads” section and check for updates.
Here is how to enable the updated Settings section:
- Download ViVeTool from GitHub and unpack it wherever convenient.
- Launch Command Prompt as Administrator and navigate to the folder containing the ViveTool files with the CD command. For example, CD C:\Vive.
- Type vivetool /enable /id:56005157 and press Enter.
- Restart your computer.
Microsoft is hosting its annual Build developer conference next week, so expect to hear a lot of developer-related news. Perhaps the new Settings page will appear among the announcements.


